Showing posts with label christmas. Show all posts

Thursday, December 29, 2011

A few Christmas projects

Now that Christmas is over, I can share some of the homemade things I did this year!
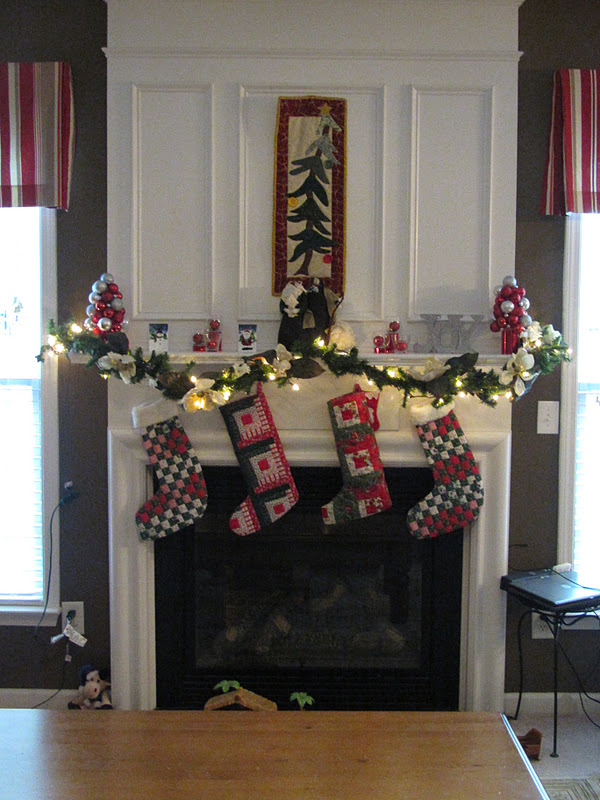
I have some cute, handmade stockings that I've been using since we got married.  Problem was that I only have 3 and this year I needed 4!  So, following the scrappy log cabin style, I made another stocking (along with some help from my mom!).  That would be easier and cheaper than buying 4 new ones, right?  The only problem is that seeing the beautiful quilt shop fabric I used on this one made me want to replace the others!! I loved the old ones until I saw the new.  And I cut this one a little small and sewed it more like a boot than like a stocking. So I guess next year I'll be making 4 new ones.  So much for easier and cheaper!
 fabric close up
with his buddies!
 My mom helped made this for me while I worked on my stocking.  My cute girl needed a new pillow for Christmas.  But what fun is a pillow without a sparkly pillowcase to cover it?  For the record, I know how to make these, but my mom has a serger and it is so much faster on that!
 I made 2 of these I spy bags.  One for a friend's birthday and one for my kids.  This is the first time I actually made one.  A few lessons I learned:
1. The hardest part is finding things to put in it.
2. Buttons are a good solution for #1
3. Don't line the back.  I sandwiched interfacing between 2 layers of fabric so the wrong side wouldn't show through the clear window.  Better to use flannel and have it be pliable - and it's ok if the wrong side shows!
4. Use hard laminating for the tag.
5. Make these square.  Seriously, what was I thinking with the circle?  Let's pick the hardest shape to sew.
6. Shower curtain liner will not work as the plastic.  Just buy some from JoAnn's.  (Or borrow some from  your sister who is also making I spy bags, like I did).
 Ours had fish on it.  For our little friend, I did a sports fabric that I've loved for a while but has needed the right project!
 Here's the contents list....
 but 3 year olds can't read, so I took pictures!
 I made table runners for some ladies at church I work with.  I was at the quilt shop buying fabric for my stocking and they had so many cute Christmas fabric, that I decided to make these so I had an excuse to buy some of the fabric!
 Love it!
 Some hooded towels for my cute baby! (In BYU colors, of course!!)
 A dolly blanket for my daughter's baby doll.  I used scraps from her brother's quilt.  Looking back, I wish I had added one more row on each side so it was a little bigger.  It works ok, but not quite big enough to sufficiently wrap the baby doll.  Or so I have been told.
 Backed with minky.  I wish I had a blanket backed with minky.  That stuff is so soft!!
 And finally I actually made some projects that I found online.  Its a miracle!! Big sister helped me make this one for little brother.  (I think the original is a little cuter, but I like mine too!)
 And a couple pom pom scarves for a cute niece! I hope she likes them!! I used variegated yarn for these, thinking that would give good color contrast.  I like how they turned out, but I think next time I would use 2 different colors of yarn.  They turned out different than I pictured, still cute, but different!

Friday, January 14, 2011

What I've been up to....

I recently turned this
and this....
 into cute "paper" dolls with clothes.  And had some leftovers to use for gifts for other little girls that may like them!
 

I made a table runner for my MIL and one for myself for Christmas.  

My quilt class is finished now, so I have turned my eyes to making Ellie a big girl blanket for her big girl bed.  Imagine this....
with this fabric...

Here's hoping I can pull it off!!

Thursday, July 8, 2010

Latest projects

Lately I've been giving my sewing machine a good workout with:
  • blocks for my block of the month class at a local quilt shop. I love going to this class! I love spending the morning with my mom and looking at all the fabric.  And I love pretending I understand all the terms everybody uses!


  • Working on ornaments for my tree this year.  I've made good progress in getting the background stars cut, most of the pieces traced and cut out of the fusible web.  Still need to fuse to fabric, cut them out again, then piece together on the star.  Think I can finish by November?
  • An awesome project for a friend who just had a baby which I can't share yet, because I haven't sent it yet and she may read this!
  • Happy thoughts about the project I bought the last time I went to the quilt shop....guess what I'm making!

Saturday, January 23, 2010

It's time to start preparations for next year!

Before December was even over, I found what I must have in my house for next Christmas. Some darling ornaments found in this book that my mom owns - Star of Wonder by Nancy Halvorsen. Ok, I really want everything in this book, but seeing as how I didn't inherit my mom's sewing gene, I am going to start small. Thanks to my mom's endless stash of fabric, the cost for this project will be minimal. And I'm hoping that the addition of 21 little handmade ornaments (3 of each of the 7 patterns) will make my tree a little less depressing next year! Here goes nothing!

Wednesday, December 16, 2009

Gifts to give away

So my sisters, mom and I (5 of us total!) came up with a great idea for giveaway gifts this year.

We all spent a little time baking and made about 6 dozen cookies to share. Then we put together plates with about 2-3 of each type of cookie. Yummy!! Next year, I'm going to have to make a plate for myself!
I paired the plate with a vinyl nativity that I got here. I put the nativity on a tile and backed it with some felt and a ribbon for hanging.

I love it! Yummy treats, decorations, and all of it for just about $2 each!

I'm linking up to the Inpsired Room's Friday Linky Party!

Tuesday, December 15, 2009

My tree, in all honesty

I have so enjoyed looking at the beautiful trees on Thrify Decor Chick'sChristmas tree party! I didn't want to post my tree because it is not that fancy. But even though my tree is not fancy or perfectly coordinated, I still love it. So here it is, in all it's glory.

The top half- breakable ornaments.
The bottom half - kid friendly ornaments for my little one to move all around. Let's be honest - with a 19 month old on the loose, no decorated tree is going to stay that way long....

The burned out strands on our prelit tree separates the two halves nicely.

Kid friendly ornaments
When we travel, we get an ornament to put on our tree. Good way to collect souvenirs without having your house full of nick-nacks! This is one from our honeymoon - an angel from a cotton plant. The little snowman was a gift from one of my students my first year teaching.
Yup, not the prettiest tree ever, but my little one likes it and I like it. Well, all except for the burned out light strands. That will have to be on next year's to do list.

Friday, December 11, 2009

A small change with a big impact

So I have been really working on my mantle this year. I liked it ok, but still felt like it needed something. I love the little jars with ornaments and snow (epsom salt). But I felt like they kind of got lost on the big white mantle. I stared at them and talked to every.single.person who came over about how I needed to make a change. Then I saw the little boxes that came with the boxes I used for my ornament trees. Using the box and the lid, I was able to add some height and color without changing the jars at all. I LOVE it!

Before:
After:


Now, if I can just get the garland up before Christmas!

Monday, December 7, 2009

If you can't be crafty, know someone who is!

One thing I love about putting up my Christmas decorations is all the memories they hold. When I was in college, my mom used to make decorations and send them to me, so my drab college apartment would have a little holiday cheer. When I pull them out now, I rememeber hanging them up in all my apartments (a different one each year of school!), in our newlywed apartment and now our first home.

Did I mention my mother is an AWESOME quilter/seamstress?

Here's a few things she has made for me. Oh, and she makes matching things for each of my 4 siblings too. Yea, she's awesome!
Advent Calendar
The pieces still to go up

I love this one!

The advent calendar (after I ate all the candy off it!) :)

I love my mom!

Friday, December 4, 2009

Christmas trees

I was totally inspired by this ornament tree.
I really needed something for my mantle, and thought the little trees would be perfect. It took a few tries, several trips to the dollar store and a whole lot of hot glue, but I think they turned out pretty well.

Here's what you need.
Ornaments - from the dollar store! :)
Ribbon
Styrofoam cone (I spray painted mine red to match the ornaments)
Small balls - my sister had some left over from her garland and gave them to me. They come as a bunch and each is attached to a wire.
Hot glue gun
First, remove the caps from the ornaments. I started by gluing the balls on. I stuck them in the foam first to make a dent in the foam. Then I filled the dent with hot glue and pressed the ornament in. I did mine very randomly, but I think it would work better if you started at the bottom and went up.

Then, I used some ribbon to fill in the cracks. I secured the end of the ribbon with a pin, then just kind of weaved the ribbon around until I was happy.
Then I pulled the silver ball bush apart and stuck the small balls in any space big enough to hold them. I didn't have a pretty base like the original. That's where the multiple dollar store trips came in. I finally found the perfect thing - a small round gift box. It came as a two pack. I decided the bigger one made a better base. Hot glue that to the bottom of the tree and Voila!
Check out the full effect.
Now I just have to figure out how to hang up my garland. Any tips? I've never done it before!
Close up -
I must point out the cute ornaments in snow/epsom salt. Thanks to the idea from The Inspired Room

I'm linking up to The Inspired Room's holiday linky party and The DIY Showoff Holiday Highlights!